
Craving a dessert that’s delightfully deceiving and totally delicious? Dirt pudding brings out everyone’s inner child with its playful presentation and irresistible combination of creamy chocolate pudding and crushed cookies. This no-bake treat has been making kids giggle and adults smile since the 1980s.
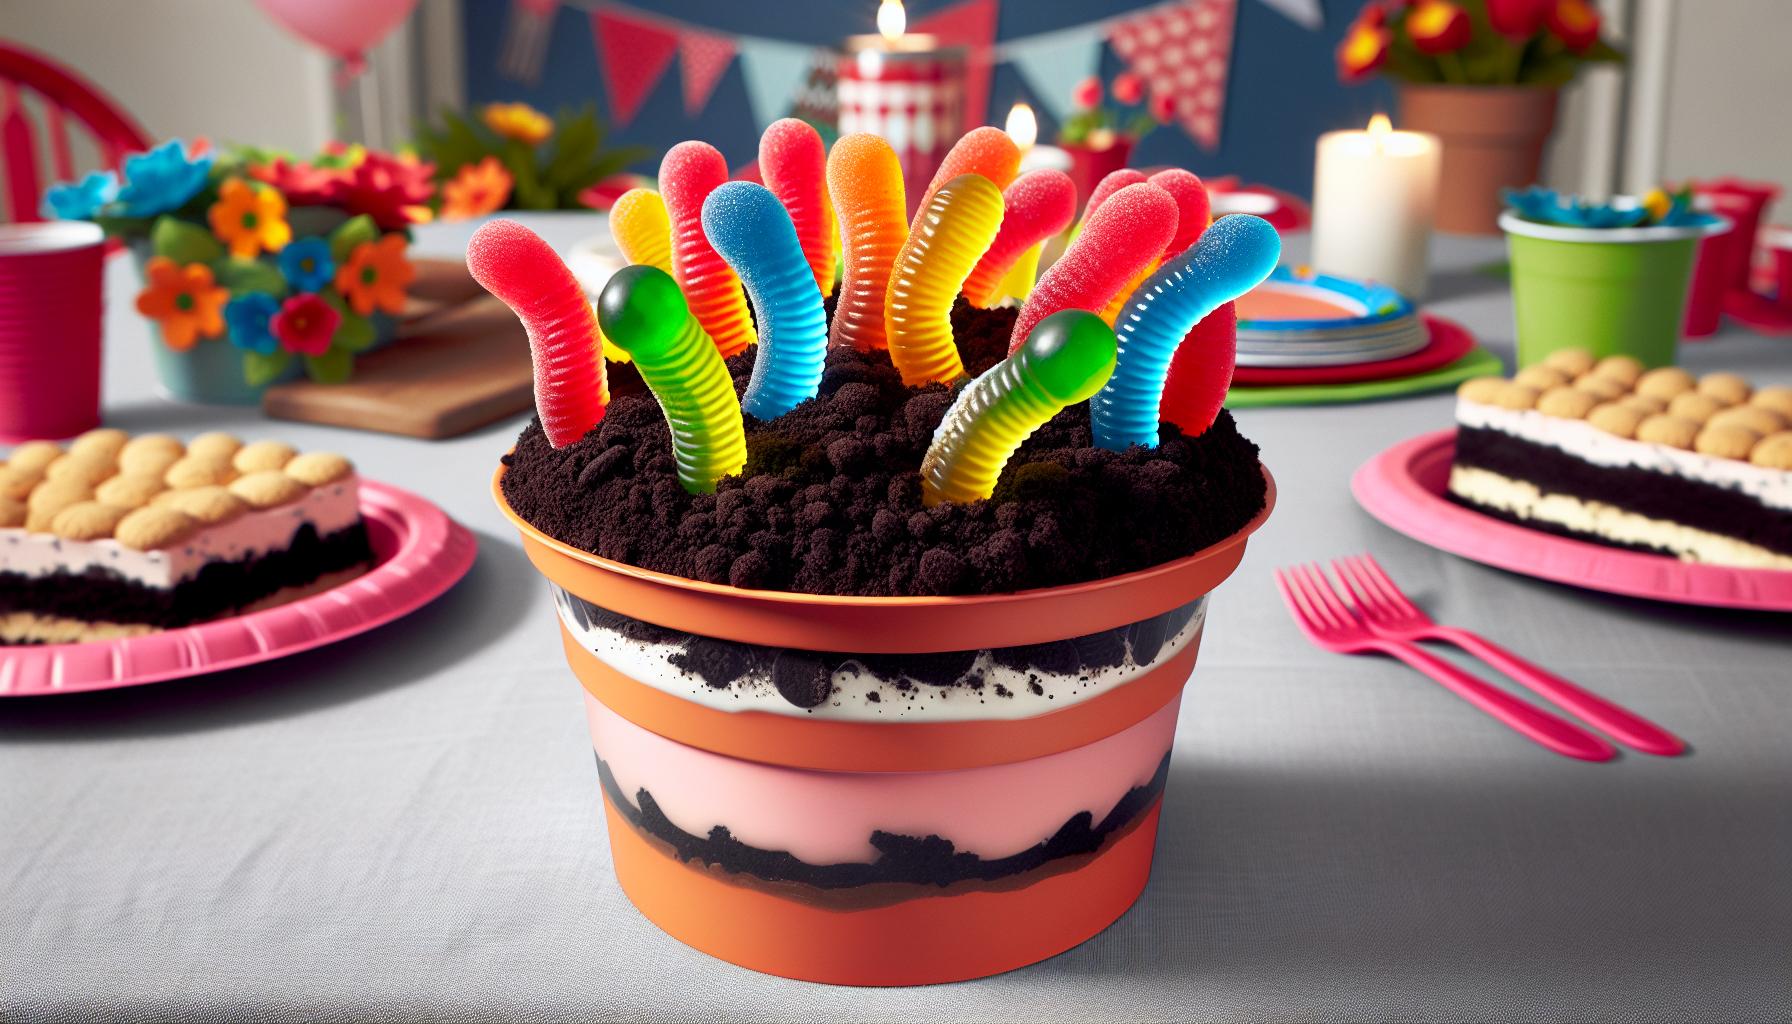
Whether it’s served in flower pots with gummy worms or elegantly layered in glass containers dirt pudding never fails to steal the show at parties potlucks and family gatherings. With just a few simple ingredients like Oreo cookies instant pudding and cream cheese anyone can create this whimsical dessert that looks like garden soil but tastes like heaven.
Table of Contents
ToggleWhat Is Dirt Pudding?
Dirt pudding combines layers of crushed chocolate cookies, creamy pudding mix, and whipped topping to create a dessert that resembles soil. This no-bake treat features a rich chocolate flavor base topped with crumbled Oreo cookies that mimic the appearance of garden dirt.
History of the Classic Dessert
The dirt pudding dessert emerged in American households during the 1980s through community cookbooks and church potlucks. Kraft Foods popularized the recipe in 1987 through their promotional materials featuring Oreo cookies and Jell-O pudding. The dessert gained widespread recognition at children’s parties where creative hosts served it in plastic flower pots with gummy worms.
| Timeline | Milestone |
|---|---|
| 1980s | First appearances in community cookbooks |
| 1987 | Kraft Foods promotes the recipe nationally |
| 1990s | Adoption as a popular children’s party dessert |
The dessert’s playful presentation transformed a simple pudding parfait into an imaginative treat that appealed to both children and adults. Local variations emerged across regions, incorporating different cookie types and decorative elements while maintaining the signature “dirty” appearance.
Essential Ingredients for Dirt Pudding
Dirt pudding combines crushed cookies, creamy pudding, and whipped ingredients to create its signature layered texture. Each component plays a specific role in achieving the classic look and taste of this no-bake dessert.
Cookie Options for the “Dirt”
Oreo cookies serve as the traditional base for dirt pudding’s soil-like appearance. Regular Oreos create a dark, rich color while Golden Oreos offer a lighter, sandy appearance. Alternative options include:
- Chocolate wafer cookies provide a fine, dark crumb texture
- Chocolate graham crackers deliver earthy undertones
- Chocolate sandwich cookies from brands like Hydrox or Newman’s Own maintain authenticity
- Chocolate Teddy Grahams create a finer “soil” texture
- Chocolate animal crackers offer a subtle sweetness
Pudding Base Varieties
The pudding mixture forms the creamy foundation of dirt pudding. Primary pudding options include:
- Chocolate instant pudding creates classic richness
- French vanilla pudding adds subtle sweetness
- Dark chocolate pudding intensifies cocoa flavor
- White chocolate pudding pairs with Golden Oreos
- Cheesecake pudding incorporates tangy notes
| Component | Amount |
|---|---|
| Cream cheese | 8 oz |
| Butter | 1/2 cup |
| Powdered sugar | 1 cup |
| Whipped topping | 8 oz |
| Milk | 3 cups |
Making the Perfect Dirt Pudding Base
Creating a creamy dirt pudding base requires precise layering techniques to achieve the ideal texture balance. The process starts with preparing individual components separately before combining them into distinct layers.
Layering Tips and Techniques
A perfectly layered dirt pudding starts with a foundation of finely crushed cookie crumbs pressed firmly into the bottom of the serving container. Here’s the optimal layering sequence:
- Place 1/4 inch of crushed cookies at the base
- Spread pudding mixture evenly using an offset spatula
- Add a second cookie layer using gentle pressure
- Pipe or spread the cream cheese mixture in swirls
- Continue alternating layers with defined edges
The cream cheese mixture spreads more smoothly at room temperature. Each layer maintains its distinct texture when chilled for 30 minutes between additions. A 2:1 ratio of pudding to cookie crumbs creates the most balanced texture. For cleaner edges in glass containers, use a piping bag for the cream cheese mixture to prevent smearing on container walls.
| Layer Component | Thickness | Chilling Time |
|---|---|---|
| Cookie Base | 1/4 inch | 15 minutes |
| Pudding Layer | 1/2 inch | 30 minutes |
| Cream Cheese Layer | 1/3 inch | 20 minutes |
Creative Presentation Ideas
Dirt pudding’s visual appeal comes from creative presentation methods that transform a simple dessert into an engaging centerpiece. The dessert’s versatility allows for numerous decorative approaches that enhance its garden-themed appearance.
Fun Garnishes and Toppings
Gummy worms create the most iconic dirt pudding topping, positioned to peek out from the crushed cookie layers. Fresh mint leaves add botanical authenticity while contributing a pop of color against the dark chocolate base. Edible flowers like pansies or violets transform the dessert into a mini garden display. Candy rocks sprinkled across the surface enhance the outdoor terrain effect. Additional toppings include:
- Chocolate rocks for a realistic gravel appearance
- Green coconut flakes dyed with food coloring to mimic grass
- Sugar mushrooms placed strategically on the surface
- Candy ladybugs or butterflies for garden authenticity
- Cookie crumb pathways creating garden trails
- Candy flower stems emerging from the “dirt”
- Small plastic garden tools as decorative elements
A light dusting of cocoa powder adds depth to the soil appearance when sprinkled over the final layer.
Storage Tips and Make-Ahead Options
Dirt pudding stays fresh in an airtight container in the refrigerator for 3 days. Storing individual portions in mason jars or sealed containers preserves the distinct layers better than family-style servings.
Make-ahead preparation creates convenience when serving dirt pudding:
- Crush cookies up to 5 days ahead, storing them in a zip-top bag
- Mix pudding base 24 hours before assembly, keeping it covered in the refrigerator
- Prepare cream cheese mixture 2 days in advance, storing it separately
- Assemble layers up to 8 hours before serving for optimal texture
Temperature considerations affect dirt pudding’s shelf life:
| Storage Method | Temperature | Maximum Time |
|---|---|---|
| Refrigerator | 35-40°F | 3 days |
| Room Temperature | 68-72°F | 2 hours |
| Freezer | 0°F | 1 month |
Signs of spoilage include:
- Pudding separation or watery texture
- Soggy cookie layers
- Sour smell from dairy ingredients
- Mold growth on surfaces
The cream cheese mixture maintains its texture best when stored separately from other components. Letting assembled dirt pudding sit at room temperature for 15 minutes softens the layers for easier serving. Freezing individual portions creates ready-to-thaw desserts that maintain quality for 1 month when wrapped properly in plastic wrap followed by aluminum foil.
Dirt pudding stands out as a timeless dessert that brings joy to any gathering. Its simple preparation belies the impressive presentation and delightful taste that’s made it a favorite for decades. Whether served in a flower pot complete with gummy worms or elegantly layered in glass containers this versatile treat continues to charm dessert lovers of all ages.
From its humble beginnings to its current status as a party staple dirt pudding proves that sometimes the most memorable desserts are the ones that make us smile. With endless possibilities for creative presentation and customization this playful dessert remains a cherished part of American dessert culture.